Watercolor isn't as permanent as people think. With a tissue, a clean damp brush and a little patience, you can take color off the paper as well as put it on. A cloud that came out as a solid blue patch, a hard line where you wanted a gentle fade, a highlight you painted straight over: most of these can be rescued.
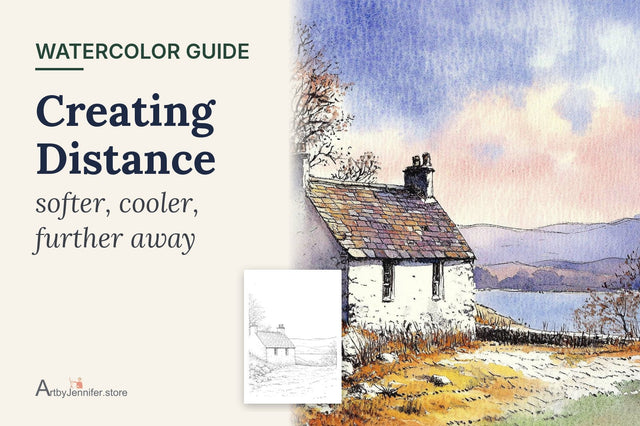
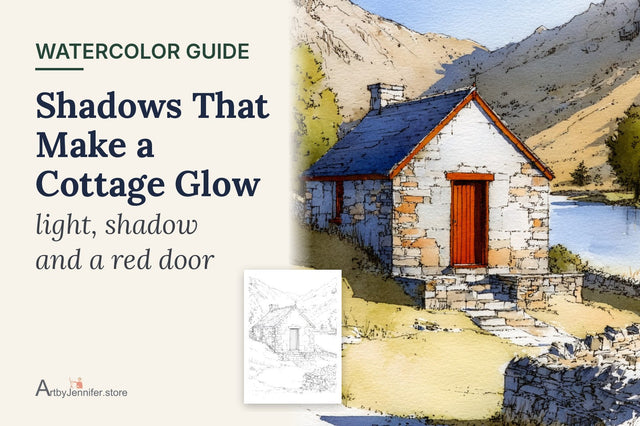
Taking paint back off is called lifting, and its close cousin is softening an edge. I use both on purpose, not just for repairs. The light streaks on the water in the moorland cottage below weren't left white; I lifted them out.

New to painting coloring pages? Start with my step-by-step guide on how to watercolor a coloring page, then come back to this one.
What lifting actually does
When watercolor dries, most of the pigment sits on or just under the surface of the paper. Until it's bound in tightly, some of it can be loosened again with water and picked up with something absorbent. You're not erasing the paint; you're taking it back a few steps toward the white of the paper.
How much comes away depends on three things: how wet the paint still is, which pigment you used, and what paper you're on. Learn those three and lifting stops being hit or miss.

Reading the shine
Timing matters more than anything else here, and the paper tells you when. Watch the surface as a wash dries. It goes from glossy wet, to a satin sheen, to a dull matte.
- Glossy: too early for a crisp lift. The color rushes back into the space you just cleared.
- Satin: the sweet spot for soft clouds and gentle lifts.
- Matte: the pigment has settled. You can still lift, but you'll need a damp brush and a few passes.

Method 1: Blot with a tissue while the paint is wet
This is the easiest lift and the one I use most for skies. While the sky wash is still wet, press a crumpled, clean tissue or a piece of kitchen paper gently into it and lift straight up. The tissue soaks up paint and leaves a soft, pale shape with a natural edge that looks very much like a cloud.
- Use a fresh, clean part of the tissue for every press, or you'll print blue back onto the paper.
- Press, don't rub. Rubbing wet paper can roughen the surface.
- Vary the pressure: a light touch gives a hazy cloud, a firmer press a brighter one.
- Make clouds bigger near the top and smaller toward the horizon, which makes the sky feel deeper.
Method 2: Lift with a damp brush
When the paint is damp or already dry, rinse a clean brush and squeeze out most of the water so it's just damp. Stroke it over the area you want lighter, then dab the spot with a tissue right away. Rinse, squeeze and repeat. Each pass takes a little more color away.
A small flat or stiff synthetic brush gives crisp lifts: streaks of light on water, a sunlit edge on a roof, the beam from a lighthouse. A soft round brush gives gentler, rounder lifts for highlights on flowers or apples.
Keep the brush only damp. The first few times I tried this, my brush was far too wet, and instead of a clean light streak I got a pale smudge with a bloom around it, because the extra water ran into the dry paint next to it. Squeeze the brush until it barely leaves a mark on a paper towel. And be patient: three gentle passes are much kinder to the paper than one hard scrub.
Method 3: Soften an edge before it sets
Sometimes you don't want to remove paint, just blur where it stops. A shadow under the eaves, the edge of a distant hill or the rim of a cloud often looks better soft than sharp. As soon as you lay down the color, run a clean, damp brush along the edge. The paint creeps into the damp area and fades out.
If the edge has already dried hard, you can still soften it: run a damp brush along the line a few times, then blot. It won't be quite as smooth, but it's usually much better than a sharp line you didn't want.
Which paints lift easily?
Staining pigments soak into the paper fibers and leave a tint behind however hard you work. Non-staining pigments sit more on the surface and lift cleanly. Many paint brands print a staining rating on the tube, pan or website.
| Lifts fairly easily | Tends to stain |
|---|---|
| Ultramarine blue | Phthalo blue and phthalo green |
| Cerulean blue | Alizarin crimson and many quinacridone reds |
| Burnt sienna and raw sienna | Most dye-based or very bright paints |
| Yellow ochre and many earth colors | Sap green in some brands |
That's why skies I plan to lift usually get ultramarine or cerulean. Not sure about a paint? Put a small swatch in the margin of your page, let it dry and try lifting a stripe out of it. That one test tells you what to expect.
Paper makes a big difference
Good watercolor paper is sized, treated so the paint sits a little on the surface. That makes lifting easier and protects the fibers when you work over an area. Cotton paper is the most forgiving. Cellulose watercolor paper lifts too but roughens sooner. Thin printer paper is the hardest: it pills quickly, and printed lines can smear if you scrub.
If you print your pages at home and like to lift, print on watercolor paper and check that your printer ink is waterproof once dry. Watercolor Paper Explained goes through the choices.
How I painted the moorland cottage

1. The sky
I wet the sky area with clean water, then dropped in ultramarine at milk strength, heavier at the top. While it was still wet I blotted out a few soft patches with a crumpled tissue so the light seemed to break through the clouds, then left it to dry completely.
2. The hills and moor
The distant hills are a soft violet. The moor is cadmium orange and burnt sienna, quite wet and loose, painted wet-on-wet so the colors mingled. Blooms here only add to the wild, windswept feeling.
3. The water and reflection
Once the moor was dry, I painted the water with a soft cerulean and pulled a little of the orange and violet down into it for reflections. When that was just damp, I took a clean, squeezed-out flat brush and lifted several thin horizontal streaks across the water, blotting after each one. Those streaks are what make it read as still water catching the light.
4. The cottage
Last came the roof in sap green, mostly white walls, and dark windows and a few stones painted wet-on-dry. I softened the shadow at the base of the walls with a damp brush so the cottage settles into the land instead of sitting on top of it.

Lifting to fix mistakes
- Color went over a line: let it dry, then lift the stray paint with a small damp brush and blot. Work from outside the line inward.
- An area is too dark: lift the whole patch gently with a damp flat brush, a little at a time, instead of painting over it.
- A bloom you don't like: once dry, soften its hard edge with a damp brush and blot, then glaze over it lightly if needed.
- Lost a highlight: lift it back out with a small stiff brush, then dab with a tissue.
If the paper surface starts to look fuzzy, stop. Let it dry fully and decide whether the area really needs more work.
When lifting doesn't work
| What you see | Why it happens | What to try |
|---|---|---|
| Hardly anything lifts | Staining pigment, or paint fully dry on unsized paper | Test pigments first; lift while the paint is still damp |
| Paper looks fuzzy or pilled | Scrubbing too hard or too often | Use gentle passes and blot; switch to cotton paper |
| A bloom appeared around the lift | Brush too wet | Squeeze the brush until it's only damp |
| Printed lines smeared | Ink not waterproof | Test the print first; lift around lines, not over them |
| Cloud edges look harsh | Paint had started to dry before blotting | Blot sooner, while the wash is still shiny |
Frequently asked questions
What does lifting mean in watercolor?
Removing some paint from the paper with a damp brush, a tissue or a sponge, to lighten an area, add highlights such as clouds, or correct a mistake.
Can you lift watercolor once it's dry?
Often, yes. Rewet the area with a damp brush, then blot. Non-staining pigments on good watercolor paper lift well even when dry; staining pigments leave a tint behind.
Is a tissue or a sponge better for lifting?
A tissue is best for soft clouds in a wet wash. A damp brush or a small sponge is better for lifting dry paint in a controlled shape.
Practice pages
Big skies and still water are the best places to practice lifting. The 30 Country-Style set has plenty of open moors, lakes and cloudy hillsides, and each design comes with a color guide showing which colors I used.
Lifting works hand in hand with glazing: one takes color back, the other adds it in thin layers, and between them you can adjust almost any area of a page.