A watercolor wash is an area of paint laid down in one smooth, continuous pass. Almost every coloring page is built from them: the sky behind a cottage, the walls of a house, the sea, the sand, the shadow under a porch. When the washes come out streaky or striped, the whole page looks unsettled, even if every detail is perfect.
There are three washes I use over and over: flat, graded and variegated. All you need to try them is a round brush, one color and a scrap of watercolor paper.

New to painting coloring pages? Start with my step-by-step guide on how to watercolor a coloring page, then come back to this one.
What makes a wash smooth
It comes down to one idea: keep a wet edge. As long as each new stroke touches paint that's still wet, the strokes melt into one even layer. The moment a stroke meets paint that has started to dry, you get a hard line or a streak.
- Mix more paint than you think you need. I learned this one on big skies. I'd run out two-thirds of the way down, stop to mix more, and come back to a top half that had already started drying. The line where I stopped never went away.
- Tilt your board slightly, about 10 to 15 degrees, by resting the top edge on a book. Gravity pulls the paint gently downward into a bead along the bottom of each stroke.
- Work steadily from top to bottom. Don't stop to admire it, and don't go back into the top while you're working on the bottom.

The flat wash
One color at one strength, with no visible change from top to bottom. On a coloring page it's for walls, doors, roofs, a calm patch of sea or any shape that should look evenly colored.
- Mix a pool of color at milk strength, enough to cover the whole area twice.
- Load your brush fully and paint a horizontal stroke across the top of the shape. Because the board is tilted, a small bead of paint collects along the bottom of the stroke.
- Reload and paint the next stroke just below, overlapping that bead. The bead moves down with you.
- Repeat to the bottom, reloading for every stroke so the brush never runs dry.
- Pick up the last bead. Squeeze the brush almost dry on a paper towel and touch it to the bead at the bottom edge. Left alone, that bead can creep back up and dry as a bloom.
On a printed page, trace the top edge first with the tip of the brush, then pull the bead down with side strokes.
The graded wash
A graded wash goes from strong to pale, usually top to bottom. It's the most natural way to paint a sky, because real skies are deeper overhead and lighter near the horizon. It also works for water, shadows that fade out, and light falling off along a wall.
- Start with a strong mix and paint the first band across the top, just like a flat wash.
- Dip only the tip of the brush in clean water before each new stroke, then pick up a little of the mix. Each band carries slightly more water and slightly less paint.
- Keep pulling the bead down. By the bottom you should be painting with almost clear water.
- Lift the last bead with a nearly dry brush.
Change the strength gradually. A lot of water in one stroke gives you a step instead of a fade; small changes, many times, give the softest gradient. Want the sky to fade toward the top instead? Turn the page upside down and paint it the same way.
The variegated wash
A variegated wash blends two or three colors into each other while they're all wet: a sunset moving from blue to lilac to peach, a fall hillside, a sea that turns from deep blue to turquoise near the shore.
- Mix every color before you start, in separate wells. Once the first color is on the paper, there's no time to stop.
- Paint the first color across the top third with horizontal strokes.
- Rinse briefly, load the second color and start just inside the bottom of the first band, so the two touch while both are wet. Let them mingle on their own instead of stirring them together.
- Add the third color the same way, then lift the final bead.
Pick colors that sit next to each other on the color wheel, like blue and violet or yellow and orange. Opposites such as orange and blue can turn gray or muddy where they meet.
How I painted the seaside house

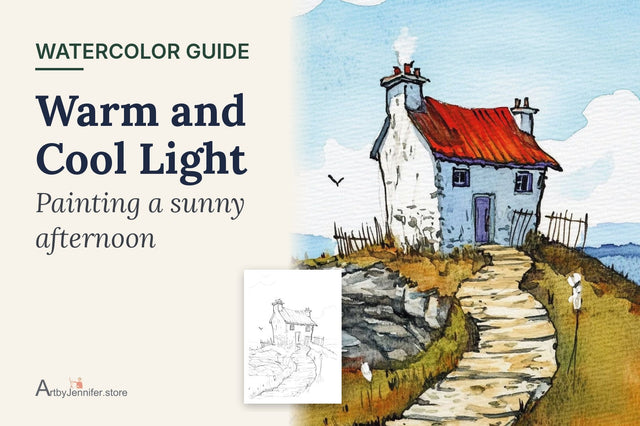
- Sky first: a graded wash of soft blue, strongest at the top corners and fading to nothing by the time it reaches the roof line.
- Walls next, once the sky was dry: a flat wash of very pale blue-gray on the sunny side and a slightly deeper flat wash on the shadow side.
- Sand last: a pale variegated wash moving from warm cream near the house to a cooler gray at the bottom edge.
Everything else, the stairs, the dune grass, the window frames, is detail painted on top once those washes were completely dry.

Washing around details
Coloring pages have lots of small shapes in the middle of big areas: a window in a wall, a chimney against the sky, a railing across the sea. You don't need to stop the wash at each one.
- Paint around small shapes as you go. Carry the bead past the shape on both sides, then join it again underneath.
- Break a big area into smaller ones. If a wall is interrupted by a door and three windows, treat each section between them as its own small wash.
- Keep the small shapes white for now. They get their own color later.
Common wash problems
| What you see | Why it happens | What to try |
|---|---|---|
| Stripes or bands | A stroke dried before the next one touched it | Work faster, mix more paint, tilt the board |
| Blooms at the bottom | The final bead crept back into drying paint | Lift the last bead with a squeezed-dry brush |
| Visible steps in a graded wash | Too much water added at once | Change the strength a little with every stroke |
| Muddy variegated wash | Opposite colors mixed while wet | Choose neighboring colors, or leave a white gap between them |
| Patchy, grainy color | Paint too thick, or paper too absorbent | Thin the mix; try 140 lb cold press paper |
A ten-minute wash drill
Draw three rectangles about the size of a playing card on scrap watercolor paper. Paint a flat wash in the first, a graded wash in the second and a two-color variegated wash in the third, all with one blue. Let them dry, then look closely at the edges and the bottom of each one.
Do it three days in a row and you'll be surprised how quickly the stripes disappear.
Frequently asked questions
What is a wash in watercolor?
An area of watercolor laid down in one continuous pass, so the strokes blend into a single smooth layer with no visible brush marks.
Why does my watercolor wash have streaks?
Usually because one stroke dried before the next touched it. Mix more paint, tilt your board and keep a wet bead moving down the page.
Should I wet the paper before a wash?
For a flat or graded wash on a coloring page, dry paper gives you crisper control along the printed lines. Pre-wetting is useful for very soft skies, which I cover in How to Paint Watercolor Skies and Sea.
Practice pages
The 22 Seaside Cottage set is full of big skies, pale walls and sandy foregrounds, which makes it a good place to practice all three washes. Each design comes painted, with a color guide and as clean line art.
If your washes keep drying too pale or too strong, the mix is usually the cause, and Water-to-Paint Ratio: Tea, Milk and Honey sorts that out. Ready for softer edges? Wet-on-Wet or Wet-on-Dry is the natural next step.